


 Step-by-Step Guide to Installing Adapters for External Antennas
Step 1: Power off the Verizon Internet Gateway and unplug the power cable.
Step 2: Flip the gateway upside down and remove the two phillip-head screws beneath bottom cover sticker.
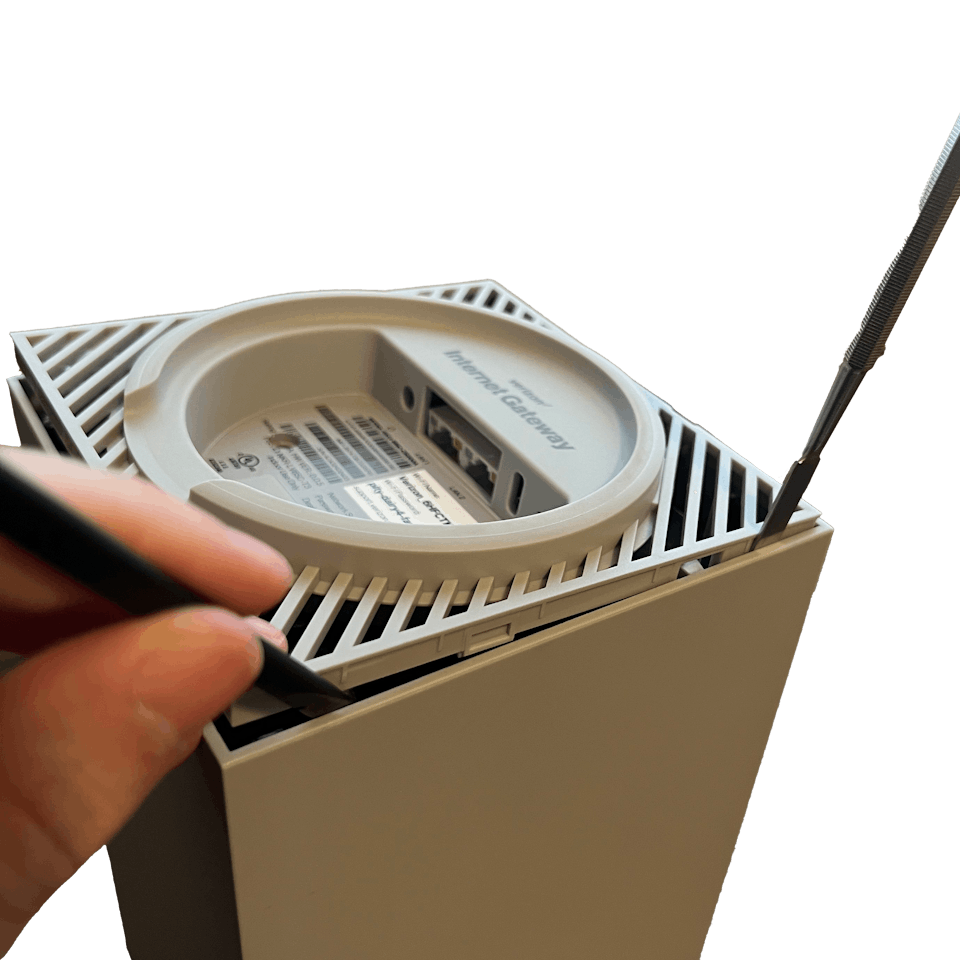
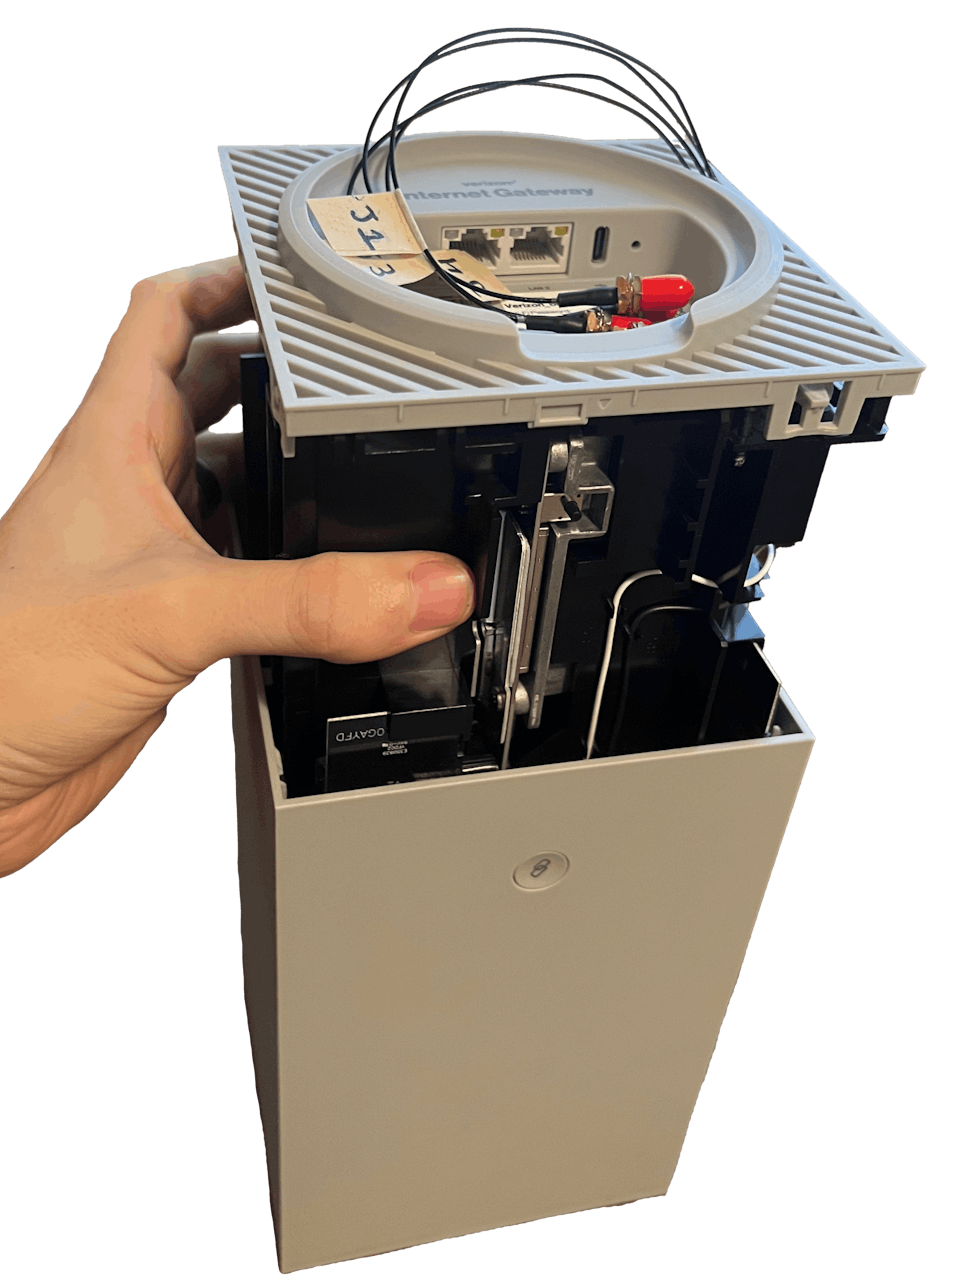
Step 3: Use a prying tool to remove the bottom cover of the gateway.
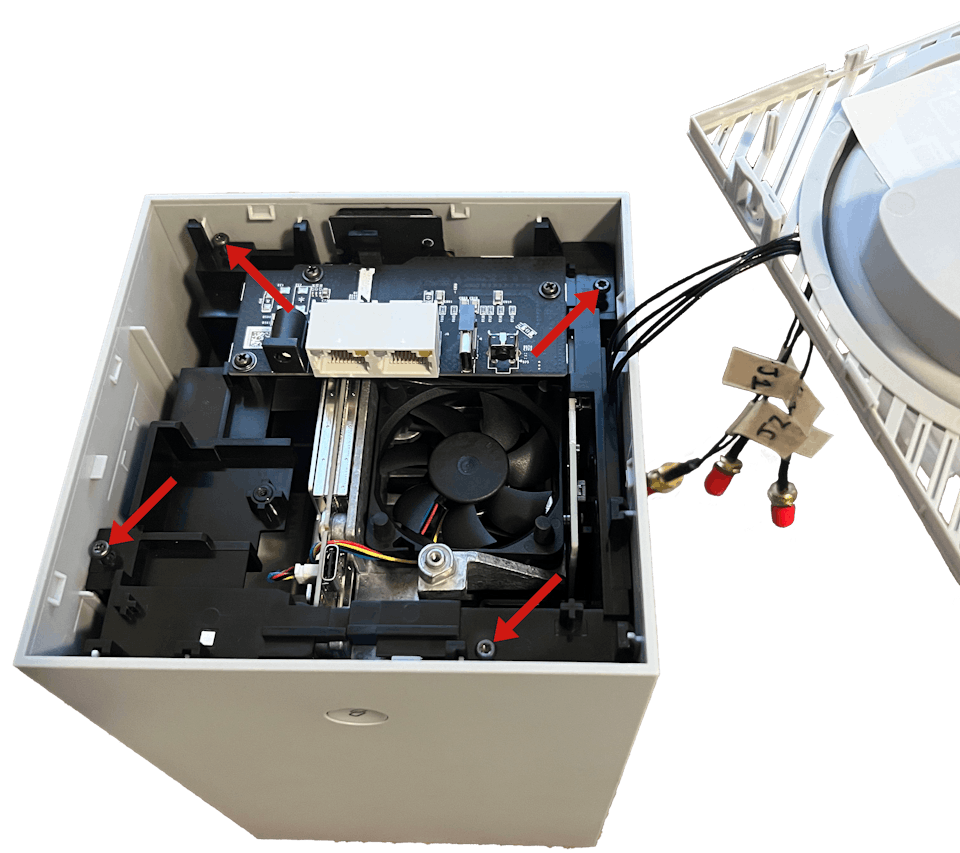
Step 4: Unscrew the four T8 Torx screws on the inner enclosure.

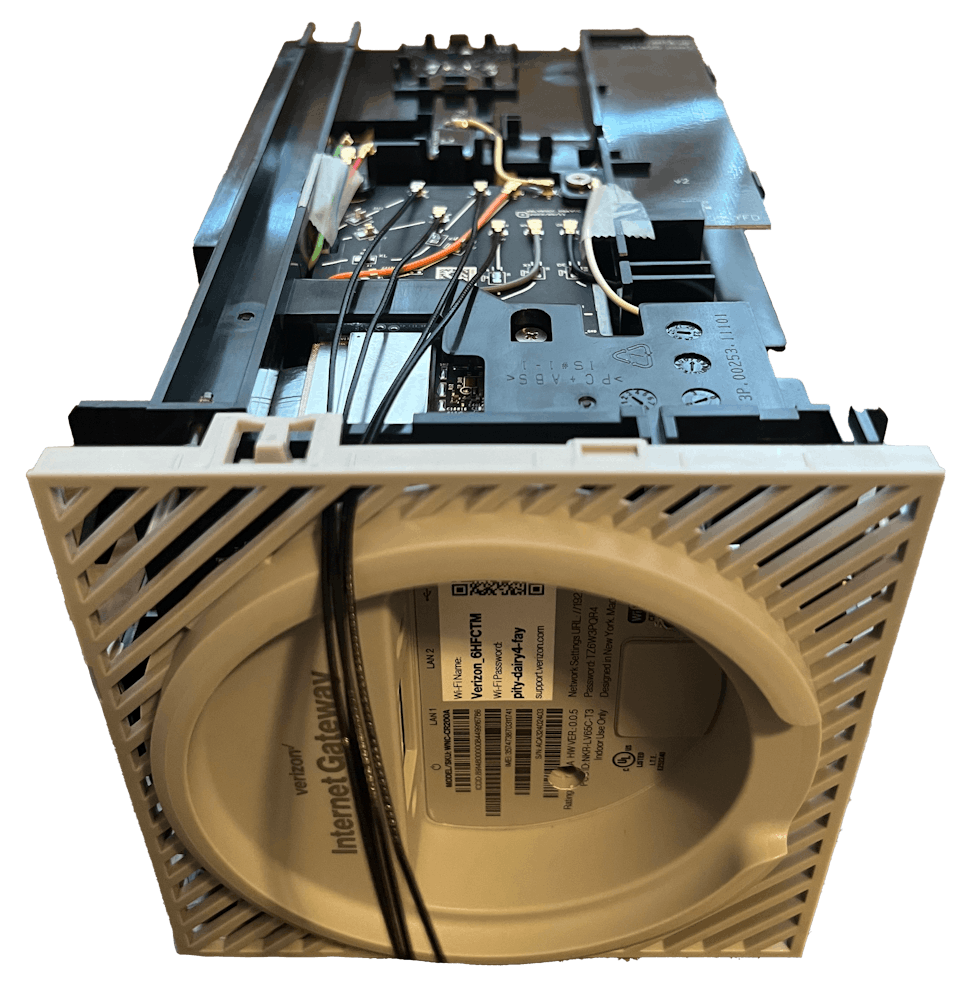
Step 5: Flip the gateway rightside up and carefully let the inner enclosure slide out.
Note: You may need to gently shake the gateway and/or use your prying tool to help ease out the inner enclosure.
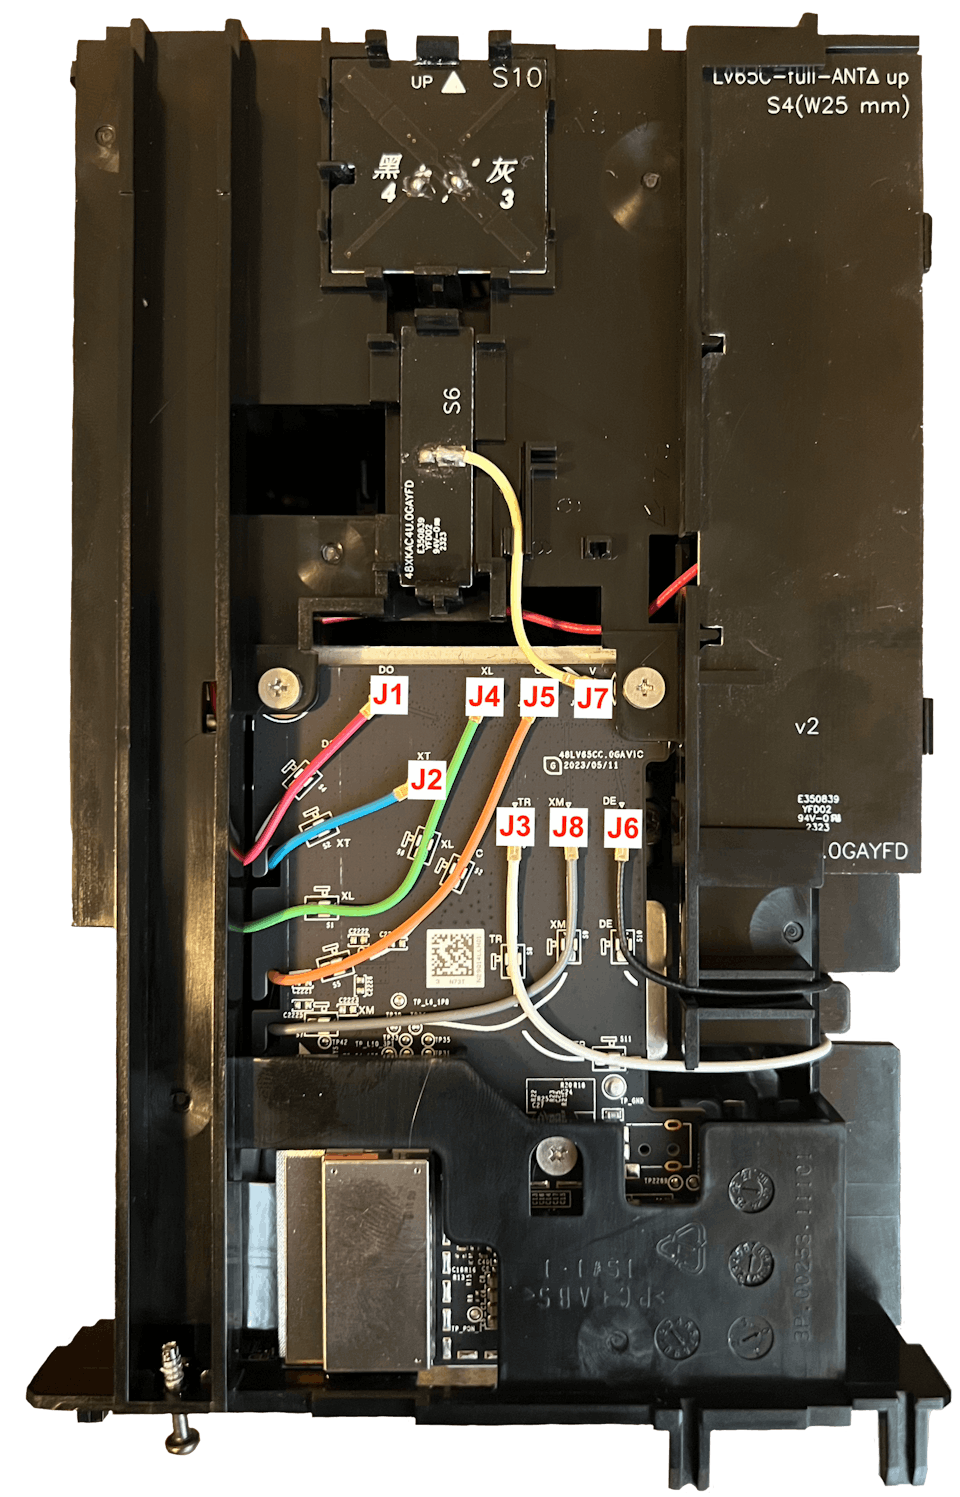
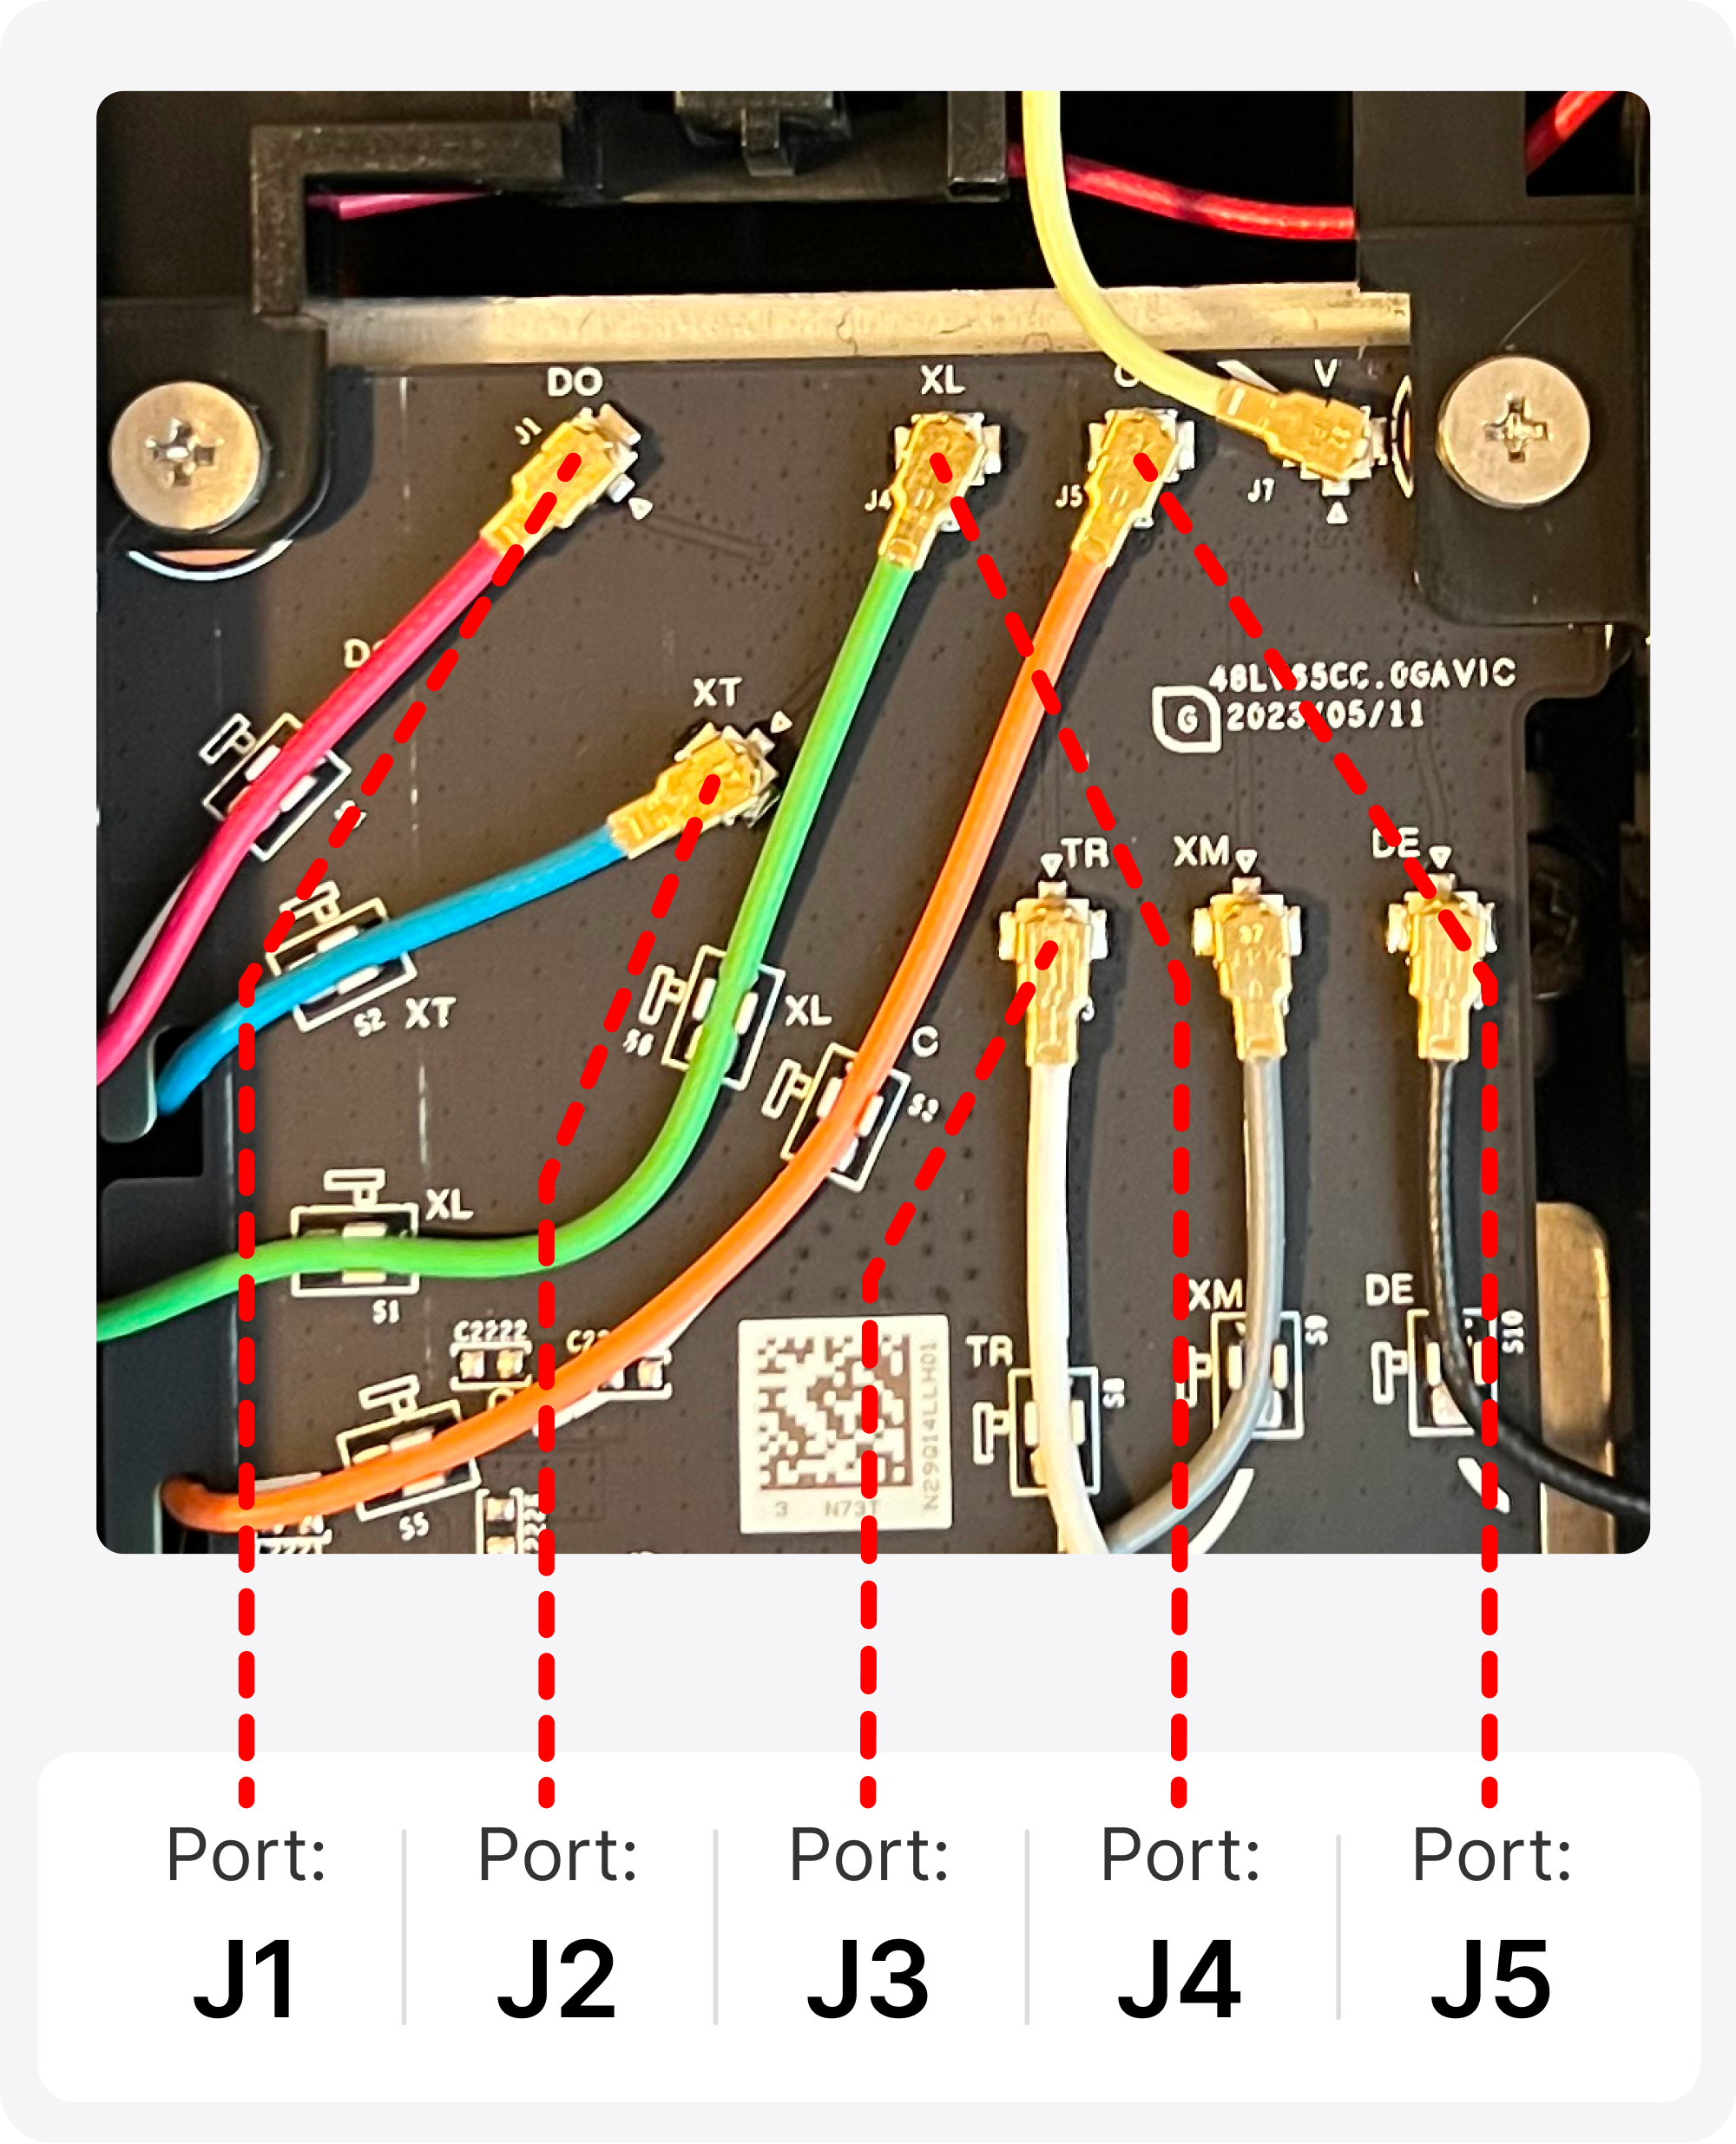
Step 6: Disconnect the antenna cables from ports J1, J2, J3, J4.
Note: In the rare instance you’re on band B2/B66, use port J5 instead of J1
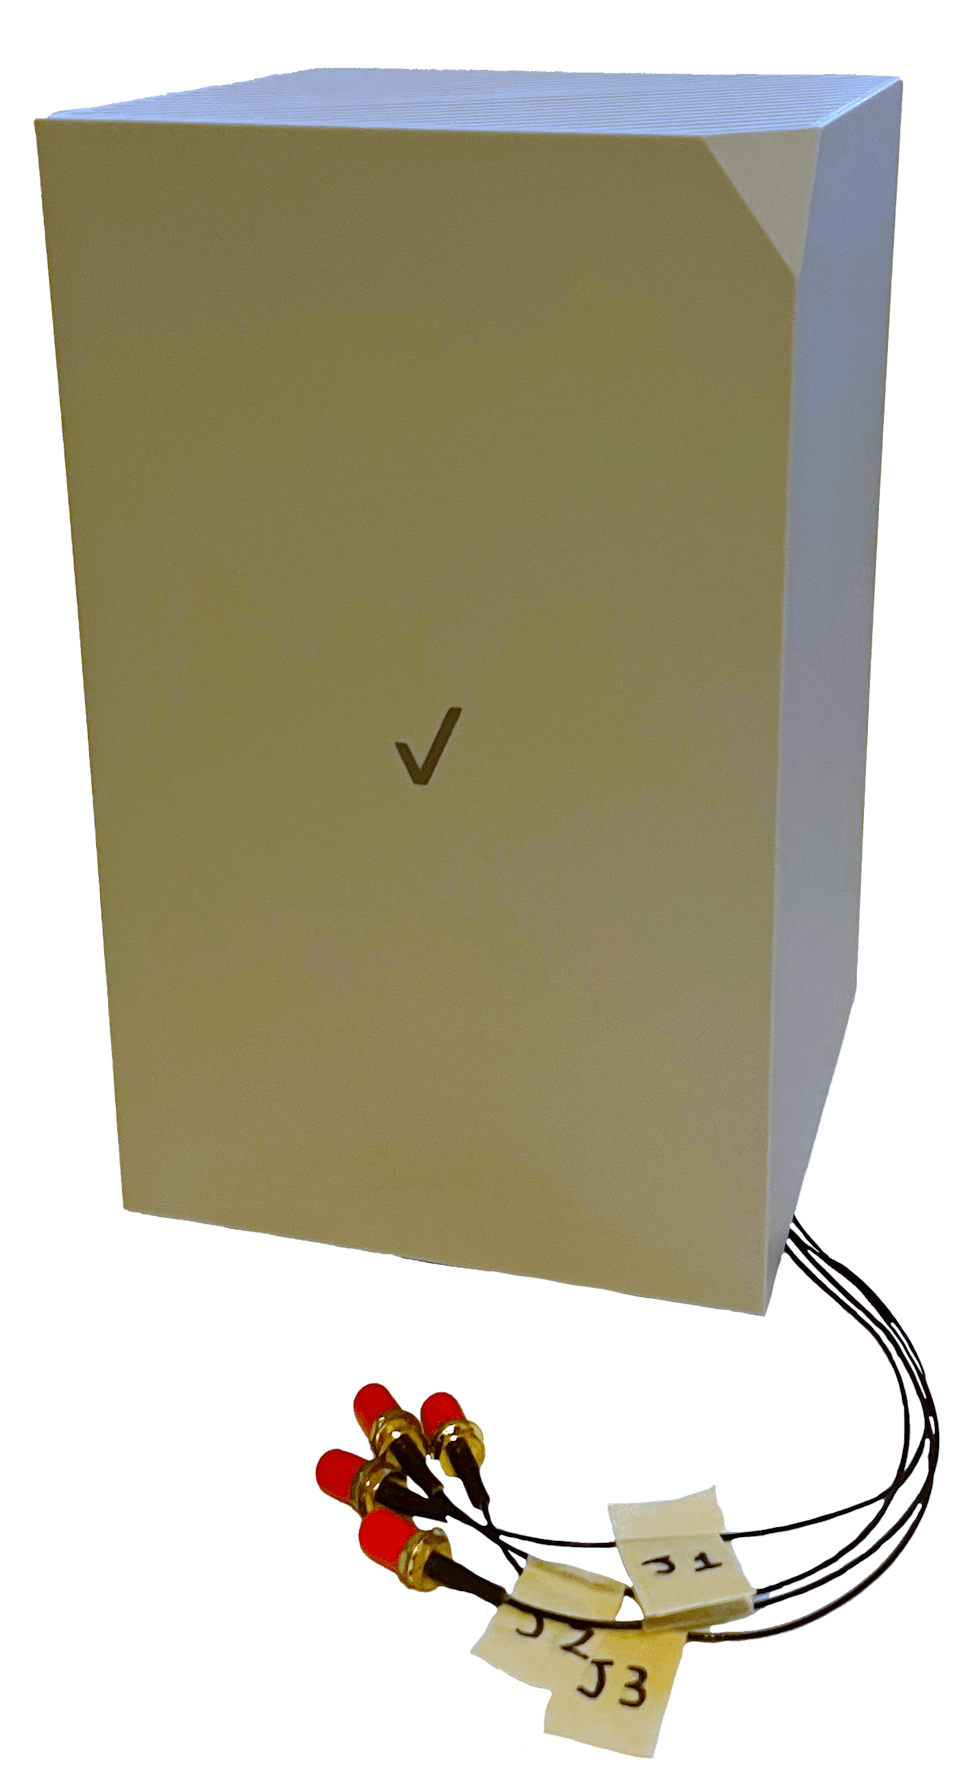
Step 7: Route the thin end of the pigtails up through the bottom cover slot as shown.
Connect them to the ports that you previously disconnected from Step 6.
Step 8: Flip the gateway upside down and rest the bottom cover on the inner enclosure. This will keep the pigtails from getting damaged or disconnecting during re-installation.
Slide the inner enclosure back into the outer cover.
Step 9: Reinstall the four screws from Step 4.
Step 10: Push the bottom cover back onto the gateway and reinstall the two phillip-head screws from Step 2 and you’re done!
If you’re using one of our 4×4 MIMO Antenna Kits, the cables are labeled 1 through 4 on each end to make it easier to match up connectors from your antenna to the gateway. You will connect your adapters in the order shown below:
Congrats! Your Verizon Internet Gateway is now connected to your more powerful MIMO External Antennas.
Positioning and Aiming MIMO Antennas
Correctly positioning and aiming MIMO antennas is crucial to getting the best performance to your Verizon Internet Gateway or indeed any other router.
We’ve actually compiled a detailed UHURA instruction manual to accompany our own MIMO Antenna Kits, where we go into depth on the best ways to aim the antennas.
The goal is to find the best location and direction for the antenna(s) to maximize data rates to the hotspot. It can take a little patience, but can have a huge impact – it’s worth a bit of extra effort!
Once you’ve got your external MIMO antennas connected, you’re ready to go outside with your “test-rig”.
With each location and direction you try, run a couple speed tests, and make a note of the results. Here are all the locations and directions where we recommend testing your MIMO antenna:
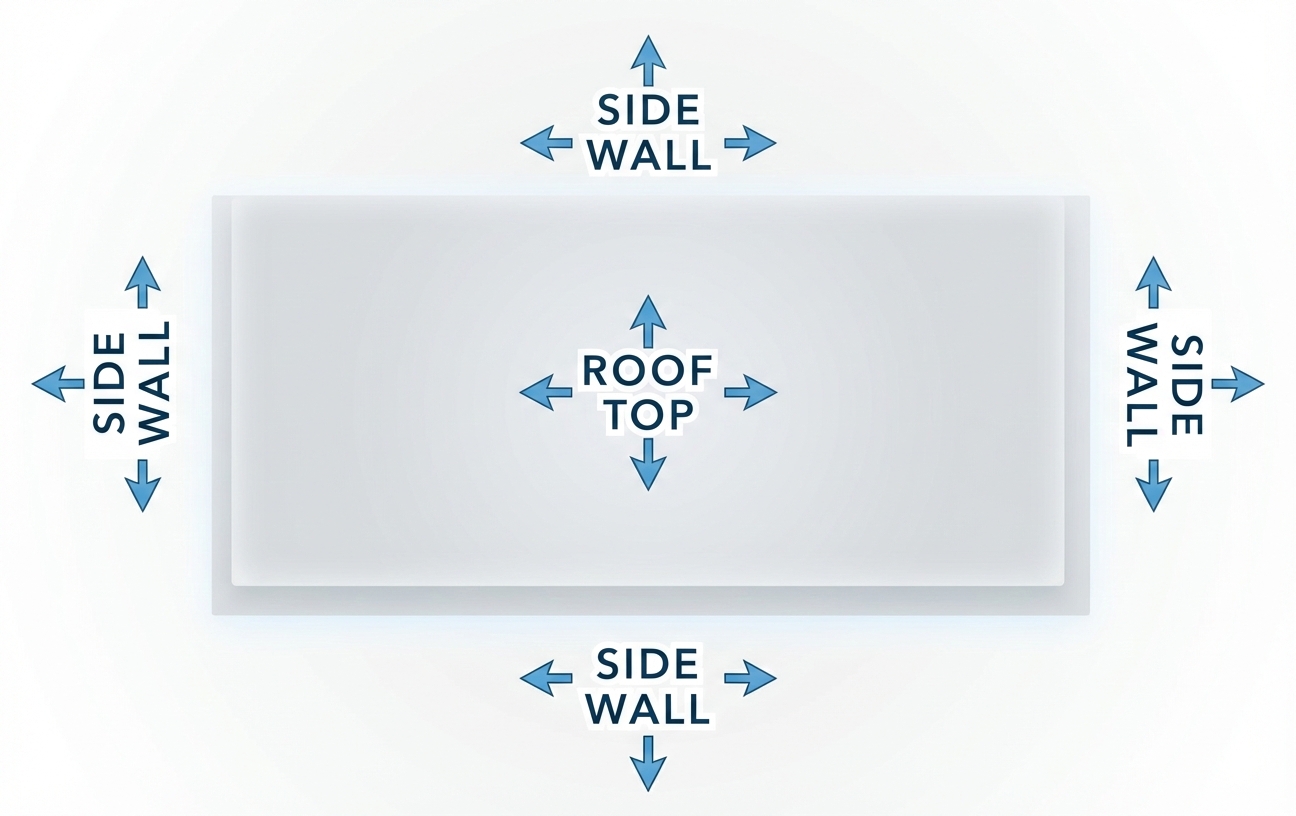
Pro Tip 1: Don’t just go to the highest point of the roof! While signal is generally stronger the higher you go, there’s also often more interference. We’ve found it’s often better to mount the antenna(s) on the side of the building where the structure can shield the antennas from interference.
Pro Tip 2: When you make bigger changes, try either power cycling or removing and re-inserting the SIM card. This forces the gateway to search for the best signal anew and can help improve data rates.
Once you’ve found the position which gets you the highest data rates to your Verizon Internet Gateway, that’s where you’ll want to install the MIMO antenna. Go ahead and mount the antenna, run cables inside, connect everything up, and enjoy superior data rates!
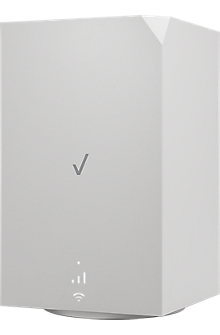
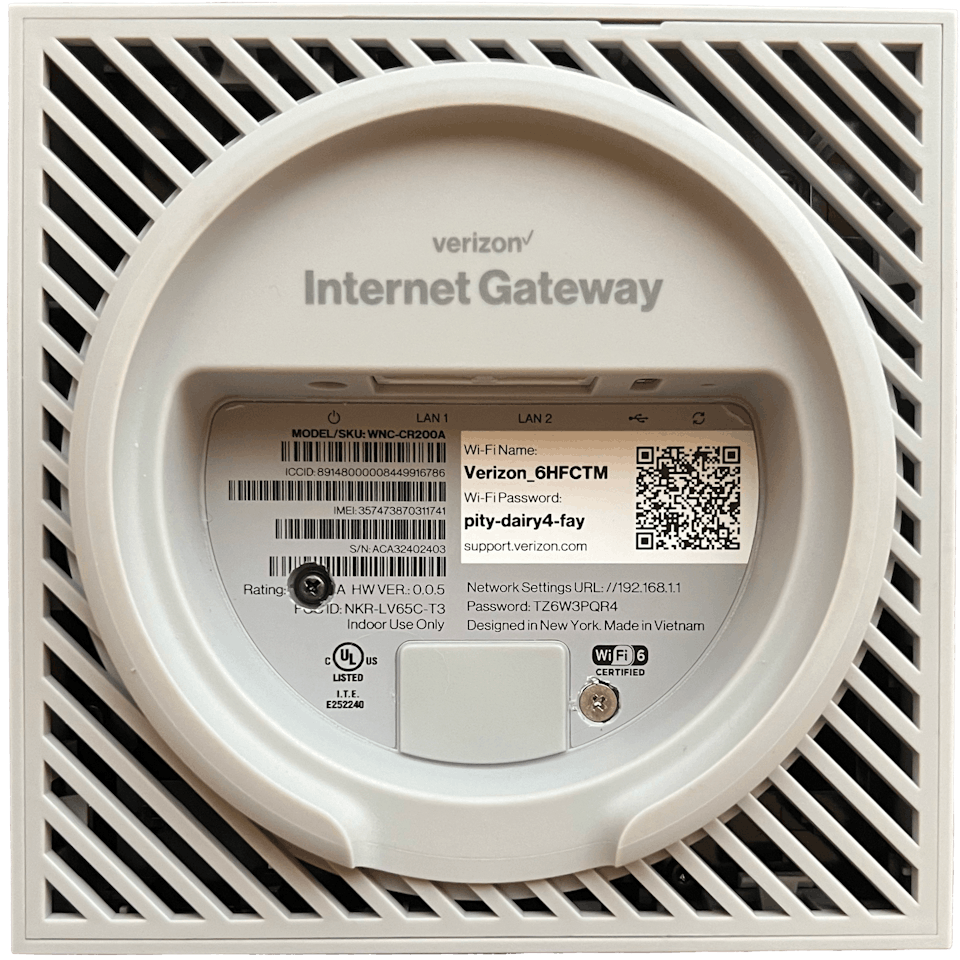
Verizon Internet Gateway (WNC-CR200A) Technical Specifications
- 5G: n2, n5, n48, n66, n77
- 4G LTE: B2, B5, B13, B48, B66
- Model: CR200A
- MIMO Support: 4×4
- Technical Standard: 3GPP Release 16 (DL CAT 20, UL CAT 18)
- Wi-fi Version: Wifi 6E
- Wifi Standards: 802.11 a/b/g/n/ac/ax
- Ethernet Ports: 2x RJ-45 LAN 2.5 Gbps ports
- Power: source adapter: 12V/3A
Other Helpful Resources
Verizon Internet (WNC-CR200A) Support page
- Verizon Internet Gateway (WNC-CR200A) – Support Overview
- Verizon Internet Gateway (WNC-CR200A) – Activate / Set Up Device