


Installing External Antennas to the AT&T Internet All-Fi Hub
Start by running several indoor speed tests. For the most accurate results, use a device connected directly to the All-Fi Hub via Ethernet whenever possible. Tests can also be performed over Wi-Fi, but be sure to stay close to the hub. Some variation in results is normal and will help establish your performance baseline, which you’ll use as a reference for improvement.
Once your baseline internet speeds have been measured, you can proceed with installing external antennas. Although the AT&T Internet All-Fi Hub does not include external antenna ports, the internal ports can be accessed and fitted with adapters to enable antenna connections.
In the next section of this guide, we’ll walk you through how to open the All-Fi Hub, connect the external antenna adapters, and reassemble the device.
Before you get started, you will need the following:
- A small phillips head screwdriver
- A 50mm or 2″ shaft Torx T8 screwdriver
- A thin plastic prying tool
- Four U.FL to SMA-Female pigtail adapters (included in our 4×4 External Antenna kits)
- Tape for securing and labeling cables. Painters or Electrical tape works best.
- A secure container to keep screws and small parts safe while you work
Step-by-Step Guide to Installing Adapters for External Antennas
Note: You won’t be able to reattach the white cover on the back of the device after reassembly.
Step 1: Power off the All-Fi Hub and unplug the power cable.
Step 2: Remove the stand by removing the two screws using a Phillips-head screwdriver.
Step 3: Remove the white cover by taking a prying tool to the plastic seam at the bottom of the outer white cover near the stand and then prying around the unit.
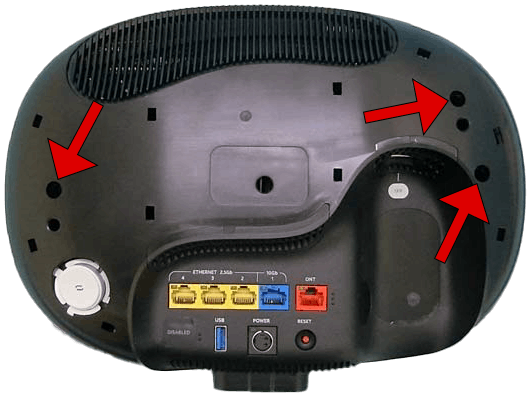
Step 4: Remove the black housing by removing the three screws located in the recesses shown.
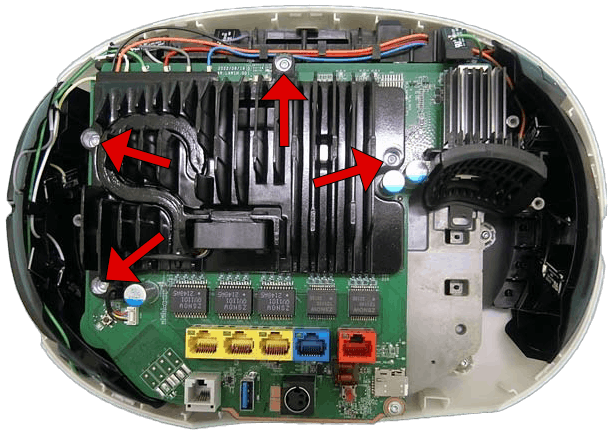
Step 5: Remove the back heatsink from the board by removing the four screws holding it in place.
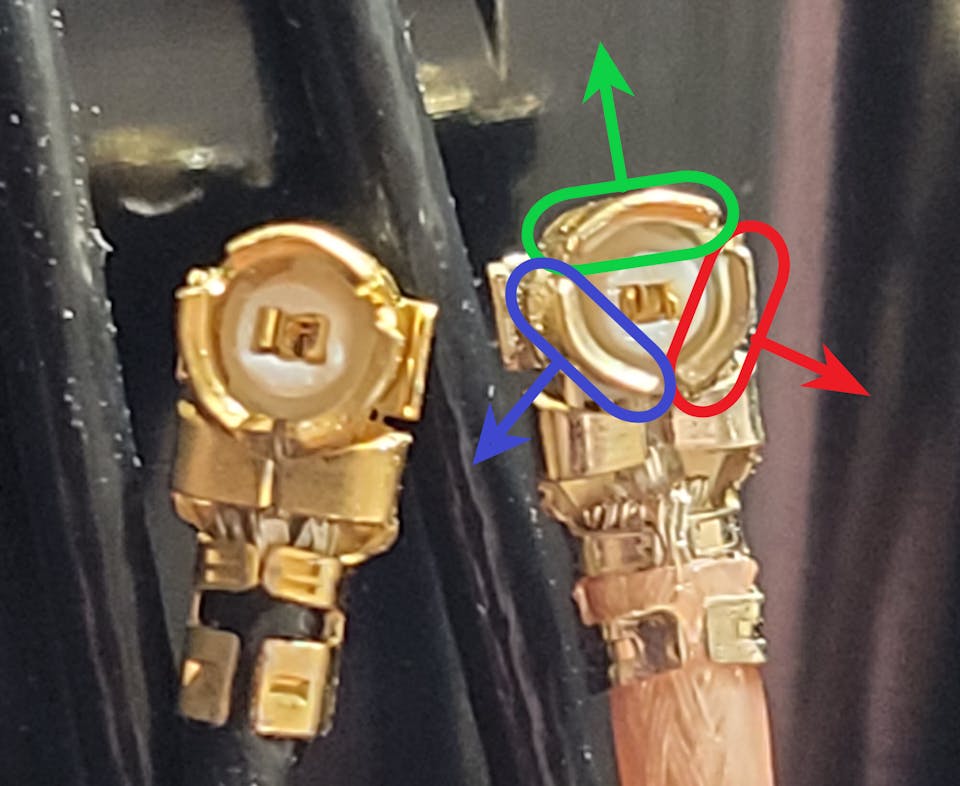
Tip: If you are struggling to get the pigtail connected, we recommend using a tweezers to spread the petals of the U.FL connector further apart, as shown in the image below:
Step 6: Feed the U.FL pigtails in through the upper vents of the black housing.
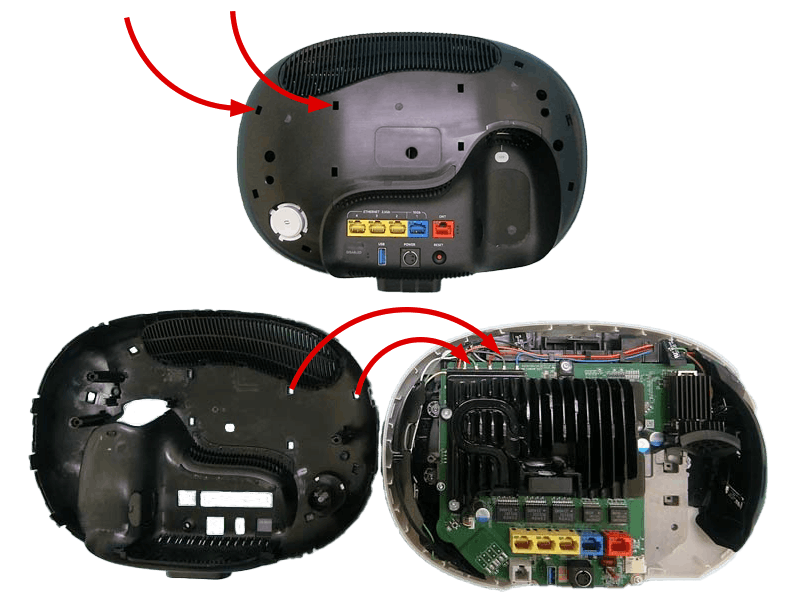
Step 7: Attach the pigtails to the newly available ports (label the other ends of the pigtails, outside the black housing for later reference).
Step 8: Re-attach the heatsink and black housing and stand in that order.
Step 9: Connect the pigtail connectors to your antenna in the following order:

Step 10 (Optional): For each pigtail adapter, loop a piece of tape around its cable and label the name of the port (0, 1, 2, 3, 4) it connects to.
Labeling the adapters will help you remember which internal port they connect to later in this guide.
Congrats! Your AT&T Internet All-Fi Hub is now connected to your more powerful MIMO External Antennas.
Positioning and Aiming MIMO Antennas
Positioning and aiming MIMO antennas well is crucial to getting the best performance to your AT&T Internet All-Fi Hub, or indeed any other hotspot.
We’ve actually compiled detailed instruction manuals for our 4×4 MIMO antennas, mainly the UHURA, where we go into depth on the best ways to aim each antenna.
The goal is to find the best location and direction for the antenna(s), to maximize data rates to the AT&T Internet All-Fi Hub. It can take a little patience, but can have a huge impact – it’s worth a bit of extra effort!
Connect your MIMO external antennas to your modified AT&T Internet All-Fi Hub via the newly installed pigtail adapters, and go outside with your “test-rig”.
With each location and direction you try, run a couple speed tests, and make a note of the results. Here are all the locations and directions where we recommend testing your MIMO antenna:
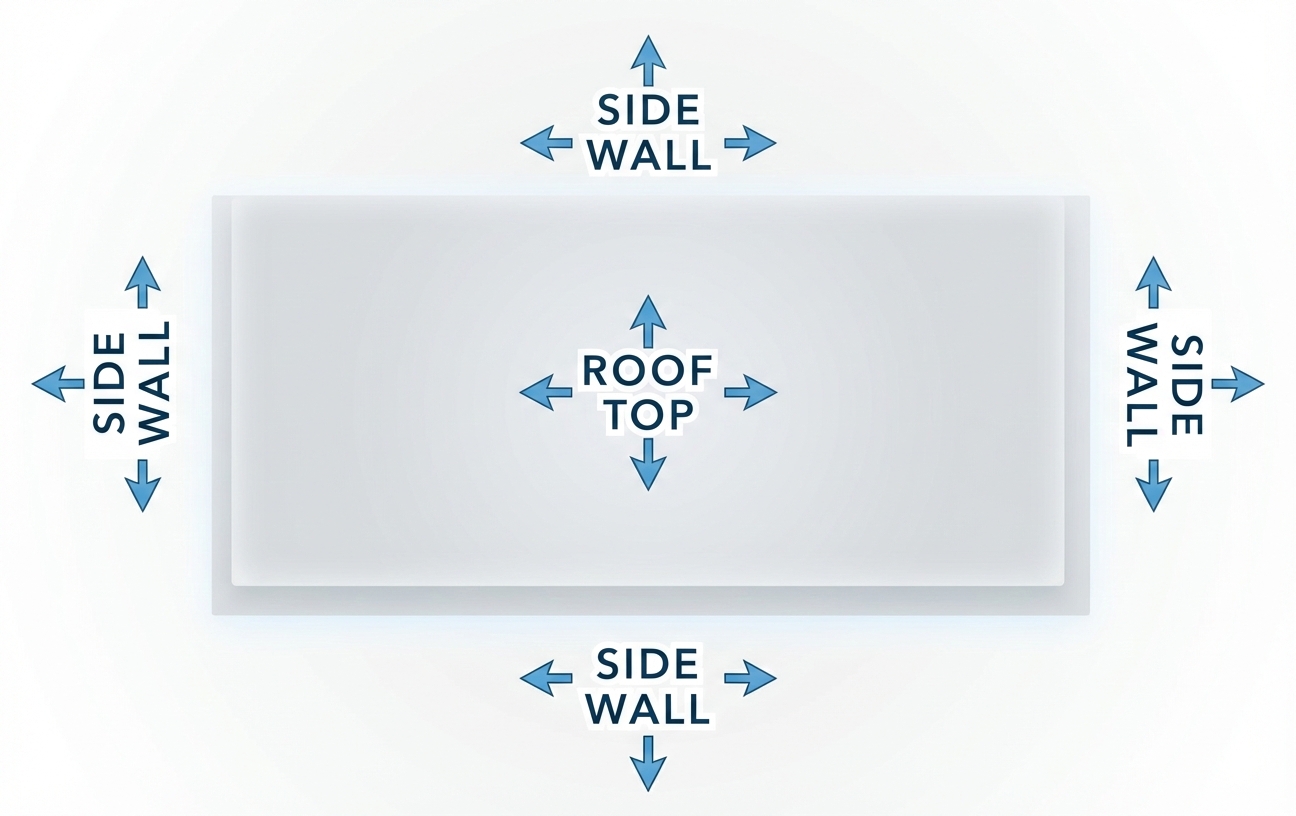
Pro tip: Don’t just go to the highest point of the roof! While signal is generally stronger the higher you go, there’s also often more interference. We’ve found it’s often better to mount the antenna(s) on the side of the building where the structure can shield the antennas from interference.
Once you’ve found the position which gets you the highest data rates to the AT&T All-Fi Hub, that’s where you’ll want to install the MIMO antenna. Go ahead and mount the antenna, run cables inside, connect everything up, and enjoy superior data rates!
AT&T Internet Air All-Fi Hub Technical Specifications
- 5G Bands: n2, n5, n12, n30, n66, n77
- 4G LTE Bands: B2, B4, B5, B12, B29, B30, B66
- Model: Qualcomm Snapdragon X65
-
MIMO Support: 8×8 with internal antennas
- 5G: DL (8RX, on n77), DL (4RX, on n2/n30/n66), and DL (2RX, on n5/n12)
- LTE: DL (4×4, on B2/30/66), and DL (2×2, on B5/12/29)
- Carrier Aggregation: Yes
- 5G: 3x Downlink; 2x Uplink
- LTE: 2-4x Downlink; 2x Uplink
- LTE Performance Category: Cat 22
- Max Theoretical Speeds:
- 5G: 10 Gbps Download, 3.0 Gbps Upload
- LTE: 2.5 Gbps Download, 316 Mbps Upload
- Technologies: Wi-Fi 6 – 802.11 ax
- Bands:
- 2.4 GHz: 4×4 MU-MIMO at 40 MHz
- 5 GHz: 4×4 MU-MIMO at 160 MHz
- 6 GHz: 4×4 MU-MIMO at 160 MHz
- Cellular Antenna Ports: 8x internal U.FL connectors
-
Ethernet Ports: 1x 10 Gbps LAN port, 1x 10 Gbps WAN port
- SIM Slot: 1x Nano SIM (4FF)
- Other Ports: 1x USB 3.2 Type-A, 1x SFP+ (XGS-PON)
- ANT_0: B2/B5/B12/B29/B30/B66 & n2/n5/n12/n30/n66/n77
- ANT_1: B2/B5/B12/B29/B30/B66 & n2/n5/n12/n30/n66/n77
- ANT_2: B2/B30/B66 & n2/n30/n66/n77
- ANT_3: B2/B30/B66 & n2/n30/n66/n77
- ANT_4: B2/B30/B66 & n2/n30/n66/n77
- ANT_5: n77 only
- ANT_6: n77 only
- ANT_7: n77 only